How to create a beautiful yoga manifesto

I find that my yoga practice is one of ebb and flow. There are times when getting on my mat is easy and other times when I really have to dig in to get myself there. Every so often, I create a yoga manifesto for myself to serve as a reminder of why I get on my mat and what I love about my practice.

A yoga manifesto helps me reignite my love for my yoga practice.

What exactly is a manifesto? A manifesto is a declaration of what is important to you about your practice, what your intentions are for your practice. It reminds you why you love your yoga.

What creating a manifesto can do for you:

  • It can help create a focus + intention for why you practice.
  • It inspires you to get on your mat even when you don’t feel like it.
  • It helps you clarify why you believe in your yoga
  • It helps you live your yoga off the mat

Here’s a couple of beautiful examples of manifestos:

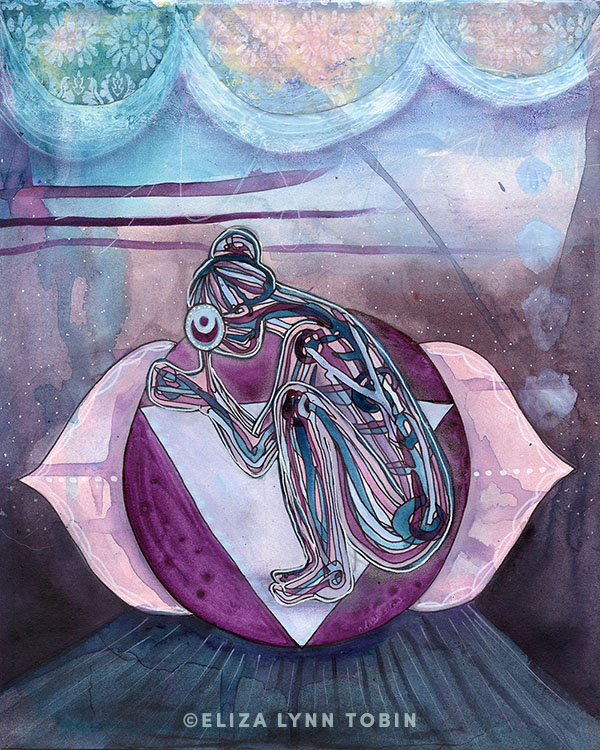
I love stumbling across beautifully articulated manifestos that inspire me. The good ones make me feel like the creators know how I want to feel.

Here are a couple of great ones:

Do those examples inspire you to want to create a manifesto? Do they make you want to reinvigorate your practice with a reminder of why you started doing yoga in the first place? Here is my step by step process for creating a yoga manifesto of your own.

The Step by Step guide to creating a yoga manifesto of your very own:

Follow along below or check out this 6 minute video I created for you:


1. Set your intention

What is your intention for your manifesto? Do you want to create one to help you discover what you believe in? Do you want it to help you unfold your vision of how yoga lives in you? Perhaps you could simply have the intention to finish the sentence, “I practice yoga because….”

Whatever it maybe, take a moment to close your eyes, take a deep breath and set your intention for creating your manifesto.

2. Gather your materials and inspiration


With your intention in mind, what materials do you want to use to create your manifesto? Perhaps just pen and paper will do it. Or you could try splashing around some paint as your background. You could look through some magazines for inspiring images or print words/images you find on the internet to help inform your manifesto.

Whatever you decide to do, gather everything that you will need for the creation of your manifesto.

3. Set up your space

Clear an area where you can work and put all your materials + bits of inspiration out in front of you.

Establish a beginning ritual. This could be as simple as closing your eyes and chanting an Om or lighting a candle. I like to clear my energy and the the energy around my space by burning a smudge stick. You could turn on some music or grab yourself a cup of tea.

Do whatever you need to do to bring yourself fully into the space and into your intention to create your manifesto.

4. Brain dump your ideas

Begin with a plain sheet of paper and some markers or pencils. Start dumping all of the ideas you have for your manifesto onto the paper. This is just a brainstorm, so it doesn’t have to be pretty.

You could you use one of the following prompts to get you started. Write one of the following in the center of your page and then map out any thoughts that come up around it:

  • I practice yoga because…
  • What I love about yoga is…
  • Yoga lives in me because…
  • I am committed to my yoga practice because…
  • Yoga inspires me because

5. Paint

 
manifesto_wip1_elizalynntobin.png
 

Choose a couple of colors to work with and start by wetting down the surface of your page. Begin to fill the paper with color. Let the paint drip and move across the page. Use your fingers to paint, add lines or splatters. The point is to fill in the background of your page.

This is a good time to turn up the tunes and let yourself play.

You can even work on a couple of pieces of paper at a time (working on one while the other dries) so that you have a couple of backgrounds to choose.

Pro tip: Start filling the page with all cool colors (greens, blues, purples) OR all warm colors (reds, oranges, yellows) first. Then let those colors dry before adding the opposite (cool or warm) colors. This will help prevent your colors from getting muddy!

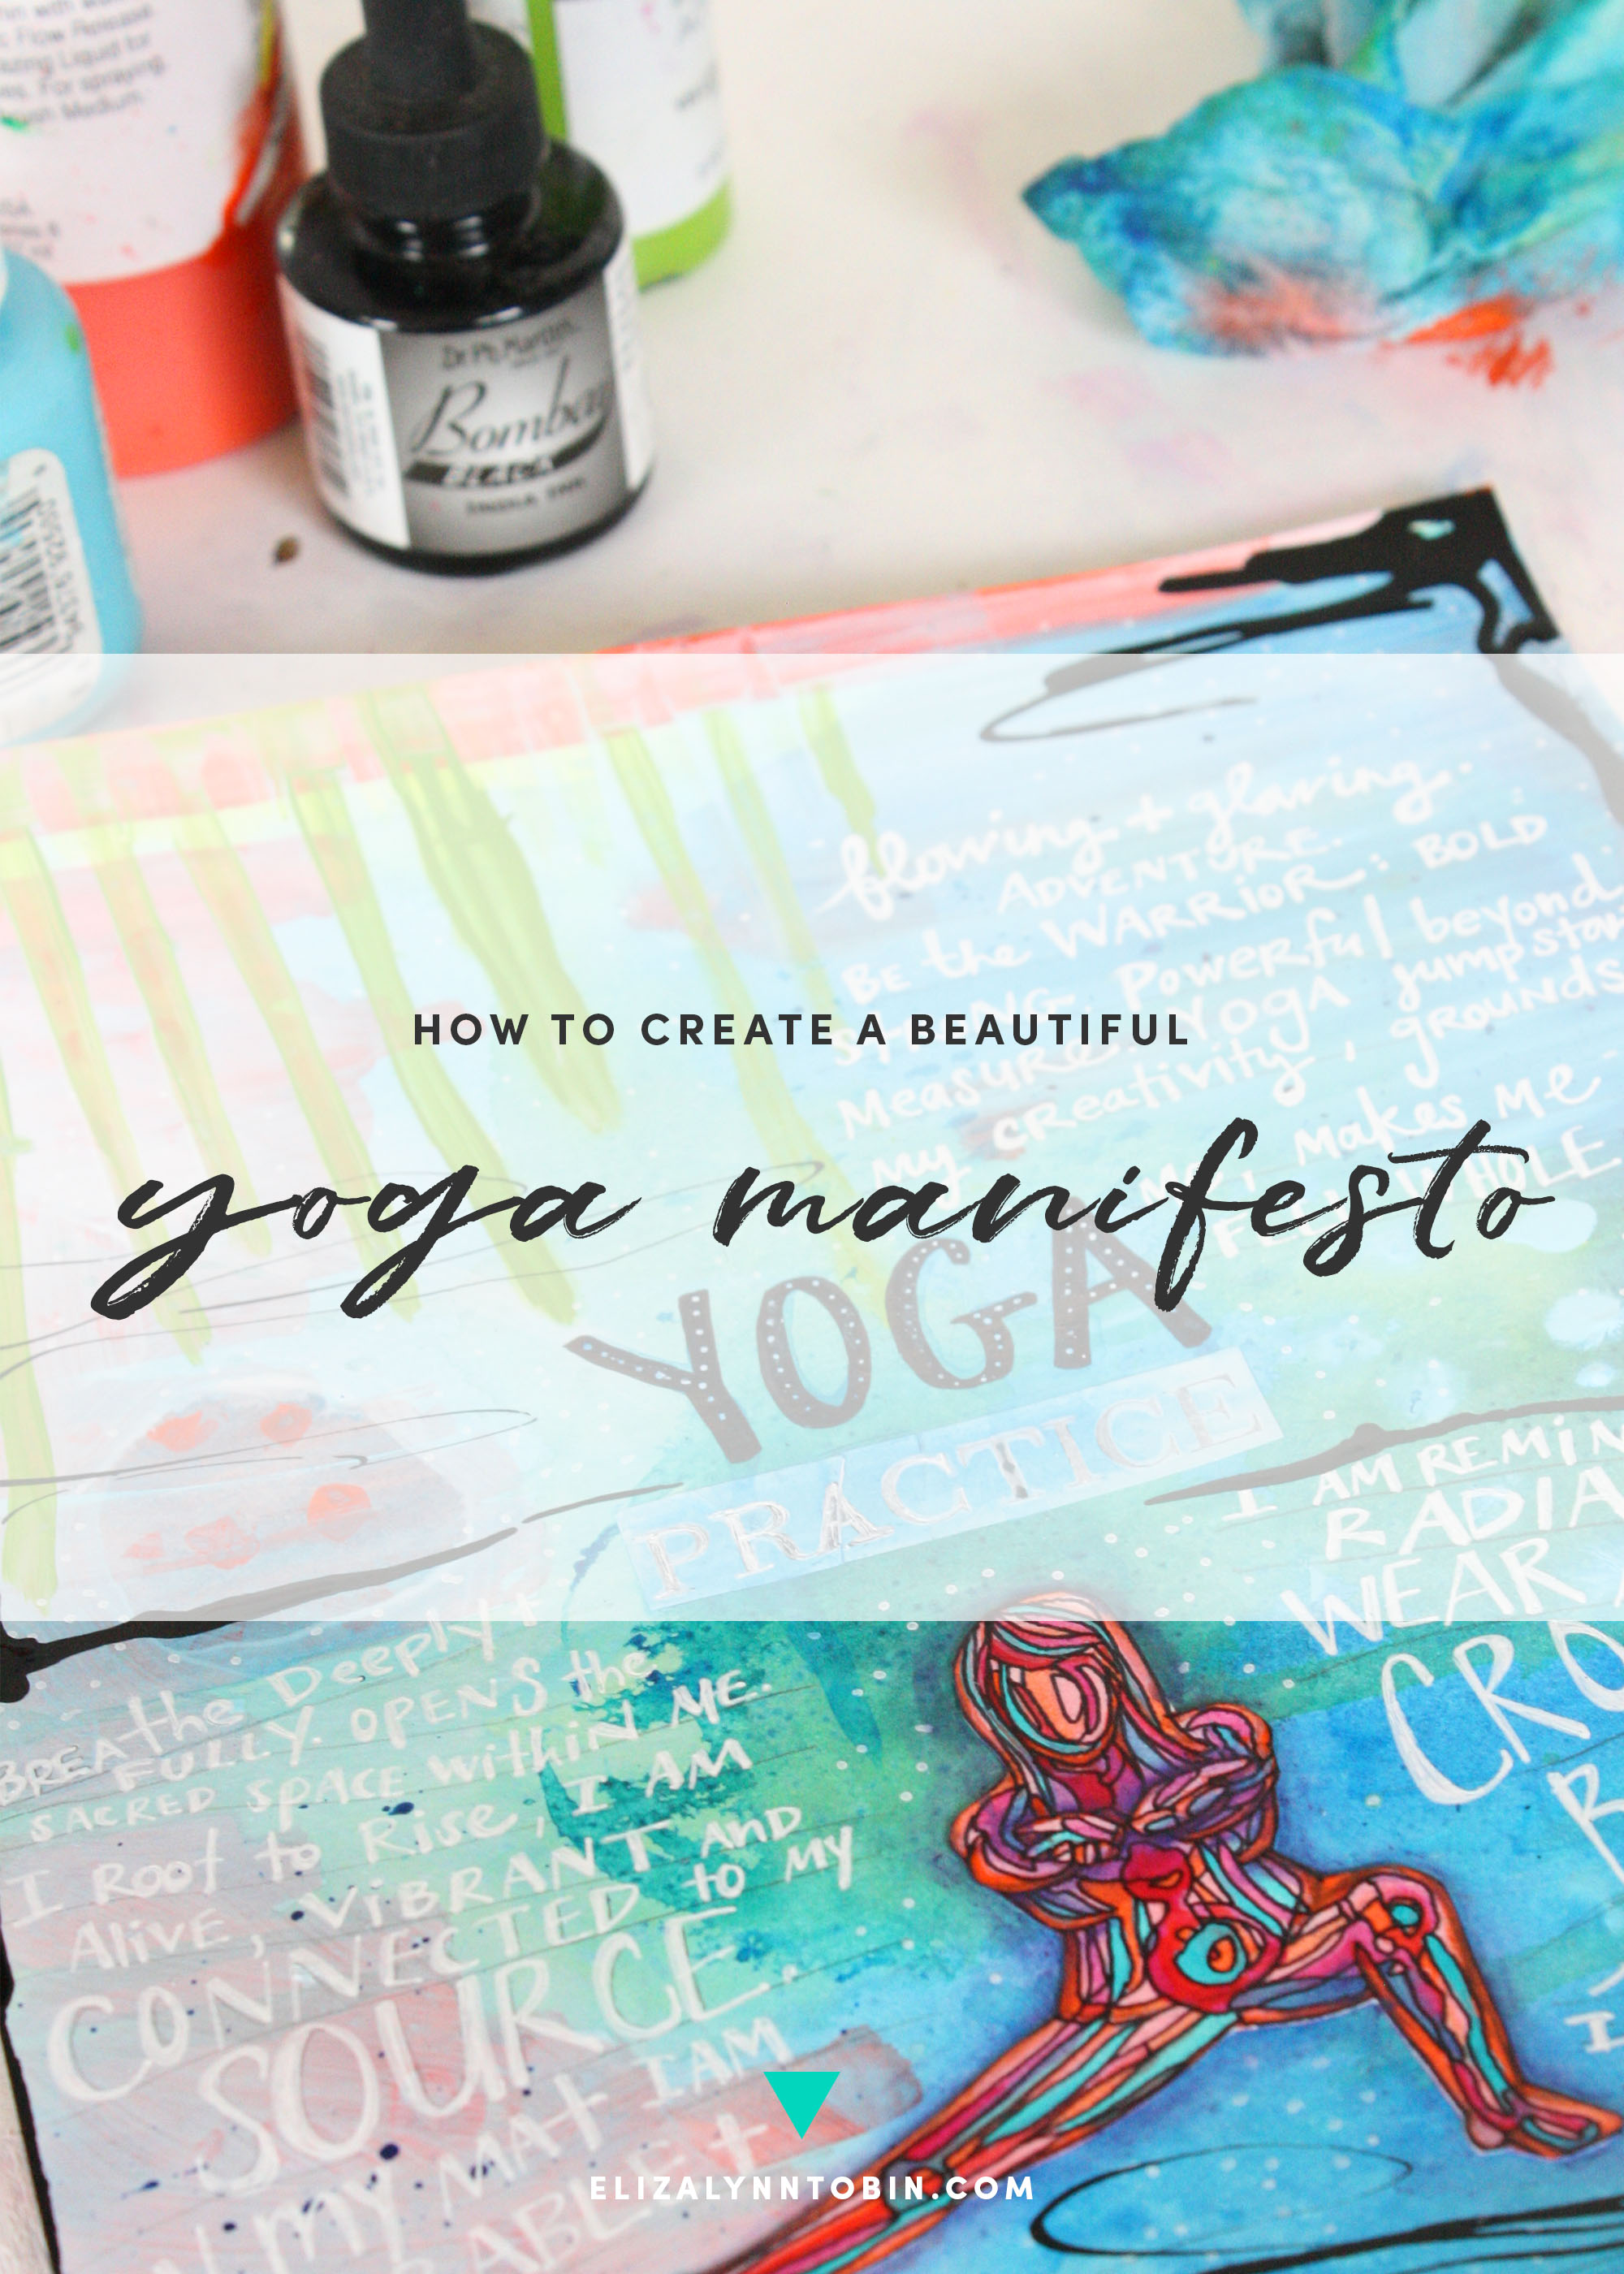
6. Write your manifesto

Taking your brain dump ideas, begin to write or draw or collage on the words to your manifesto. You can use the brain dump as a jumping off point, but if something else comes up while you are working, write it out! If you aren’t comfortable using your own handwriting, you can collage words onto your page, or type it up and cut + glue the typed version down. You could also write it out in pencil first and then go over it with a marker or pen.

7. Put it someplace you can see it

Find a place to put your new manifesto where you will see it and be reminded of why you practice yoga. Maybe frame it and put it in your bedroom so you see it first thing when you wake up!

What’s your yoga manifesto?

Write it in the comments below or share your creation on instagram or twitter using the hashtag #myyogamanifesto. I'd love to see what you come up with!

The seven chakras and their gift of creativity


What are Chakras?

The ancient yogis intuited that we all have subtle energy paths + centers all throughout our bodies. These centers are spinning wheels of energy called Chakras. Different spiritual paths describe different numbers of chakras and have assigned them different colors and attributes.

How to sense your own Chakras

The concept of the Chakras can seem really abstract and as with all subtle energy, not always readily accessible. In other words, you might not be able to feel into your own chakras and understandably, be a little bit skeptical about their existence.

And I totally get that. It’s one thing to read in a yogic text explaining that the body is made up of entities of subtle energy and when these major vortices of energy align, boom, you reach enlightenment.

It’s a whole other thing to experience the energy of these different centers for yourself. Can you really feel them in your body and have momentary (or sometimes sustained) glimpses of awakened connection with yourself and everything around you? And if you can feel them, what do they feel like?

The Tantras tell us that we all are already awake, divine, creative and connected, we are just in an on-going process of forgetting that and then remembering it again.


I like to think of the chakras as tiny gateways into the remembrance of that awakened state.

They offer us themes to work with and help us understand our experiences, traits, idiosyncrasies, and issues a little bit better. By working within the qualities and attributes of each chakra (qualities that might feel more tangible than subtle energy,) we can come to know ourselves a little bit better.  

Kundalini + your divine creative nature

It’s hard to talk about the Chakras without also talking about the energy of Kundalini.

As I understand it, kundalini is a specific form of Shakti (divine feminine energy), it’s sometimes even referred to as kundalini-shakti.

This specific form of energy is said to be coiled at the base of the spine (the root of the word Kundal, actually means “coil”) and it arises up through each of the energy centers all the way to the Crown chakra where it unites with Shiva, consciousness.

This unification of Kundalini-Shakti (divine creative energy) with Shiva (consciousness) enables a full awakened and creative state for the individual.

This is called a Kundalini awakening.

But what does this mean for regular ole yogis like you and me?


I believe that even though most of us aren't walking around in states of enlightenment, we are all having tiny awakenings happening within us all the time; little moments of oneness, peace, stillness, and expansive creativity.

Awakened Kundalini=Inspired Creativity

I also believe that within the small awakenings we experience in our every day lives, there is something profound happening to our creativity.

When the creative energy flows through a chakra and we engage with the qualities of that center, we are awakening new pathways to experience and work with the different aspects of the creative process. 

In my experience, blocked creativity looks a lot like blocked chakras. And when the chakras are awake, alive, energized and vital, and flushed with that crazy creative, powerful Kundalini-shakti, it results in flowing, inspired creativity.

Open chakras work in tandem to help you unfold your creative potential.

The Chakras


Name: Mulhadhara

Meaning: “Root Support”

Location: Base of Spine, Perineum

When the root chakra is awake and flowing with creative kundalini-shakti, you feel:

  • Strong and secure in your abilities

  • Like you deserve to create

  • That you can fully believe in yourself as an artist, as a creative being

  • Brave, gutsy even

  • Like a risk taker (in a good way)

  • A stable sense of self-worth

When the root chakra is blocked, cut off from the creative flow of kundalini-shakti, you feel:

  • Like a fake or a fraud

  • Insecure

  • Self-doubt

  • Unworthy to create

  • Like all the good ideas are gone (scarcity mindset)

Creative Exercise for the Root Chakra

Create a nature mandala. 

foxoffering_elizalynntobin.jpg
  1. Get out into nature with some time and the intention to connect with the earth. If it’s warm enough, go barefoot! 

  2. Find a place on even ground where you are feeling called to create your mandala.

  3.  Collecting sticks, or stones or any other element of nature that you find, begin to create a circle, a mandala that represents your sense of belonging on the earth.

  4. Spend as much time as you need, breathing deeply while you work.

  5. When you have finished your mandala, spend a few minutes in quiet meditation with your eyes closed or gazing down into your creation.


Name: Svadhisthana

Meaning: “Sweetness”

Location: 2 finger widths below the navel

When the Sacral Chakra is awake and flowing with creative kundalini-shakti, you feel:

  • Fluidity

  • Passion

  • Pleasure + joy

  • Expansive

  • Expressive

  • A sense of well-being

When the Sacral Chakra is blocked, cut off from the creative flow of kundalini-shakti, you feel:

  • Directionless (not sure of your passions)

  • Depleted

  • Disconnected from your feelings + emotions

  • Guilty about making art for the pure pleasure of it

Creative Exercise for the Sacral Chakra

  1. Turn up the tunes, dance in your living room. 

  2. Put on your favorite song.

  3.  Turn it up.

  4. Dance around the room, moving your entire body and especially your hips

Dancing is so good for bringing in more fluidity to the body and waking up sacral chakra!

solarheader.png


Name: Manipura            

Meaning: “Lustrous Jewel”

Location: between the sternum and stomach

When the Solar Plexus Chakra is awake and flowing with creative kundalini-shakti, you feel:

  • Like taking action + making stuff happen

  • Totally motivated to create

  • You can bring ideas to life

  • Empowered

  • Productive in how you spend your energy

  • You know yourself in relation to the world

When the Solar Plexus Chakra is blocked, cut off from the creative flow of kundalini-shakti, you feel:

  • Highly self critical

  • Depleted in your energy levels

  • Disempowered

  • Procrastination station

  • You can only find answers outside of yourself

  • No motivation to create

Creative Exercise for the Solar Plexus Chakra

Become an explorer in your own backyard.

  1. Grab a sketchbook or journal

  2. Head out for a walk around your neighborhood

  3. Begin looking at items you see everyday (doorways, trees, houses, buildings, gates, etc.)

  4. Look for patterns, textures, symbols, colors, anything unique and interesting that catches your eye and document them in your sketchbook.

Looking at ordinary things in a new way can help break your inertia and rev up the solar plexus chakra.  


heartheader.png

Name: Anahata    

Meaning: “Unstruck Resonance”

Location: Center of the chest

When the Heart Chakra is awake and flowing with creative kundalini-shakti, you feel:

  • Free to create

  • Lightheartedness around what you create

  • Spirited + energized

  • Self-acceptance

  • Grace + ease

  • United with the world around you

When the Heart Chakra is blocked, cut off from the creative flow of kundalini-shakti, you feel:

  • Egotistical

  • Locked in your own self-defined boundaries

  • Fear of rejection

  • Separate from the world around you

Creative Exercise for the Heart Chakra

Paint with the Breath.

  1. Get out some watercolor paper and paint.

  2. Wet down the watercolor paper.

  3. Put some paint on your brush and take a deep inhale. Exhale and let the paint move through the water and over the surface of the page. Continue this process until you have filled the page.

The Heart Chakra is connected with the breath and the energy that is carried into the breath, so tuning into your breath helps to open the heart chakra.

Related: Painting with the Breath: An exploration of Shakti


Name: Vishuddha    

Meaning: “Purification”

Location: the throat

When the Throat Chakra is awake and flowing with creative kundalini-shakti, you feel:

  • Comfortable expressing your truth

  • Authentic

  • You are finding your voice and style as a creator

  • Connected to your creative energy

  • A zest for your creative life

When the Throat Chakra is blocked, cut off from the creative flow of kundalini-shakti, you feel:

  • You have to hide or suppress your truth

  • Disconnected to a higher truth

  • Like you don’t have a voice

  • Uncreative

  • Worn out

  • You have a hard time saying no to projects/plans/people that don’t fire you up

Creative Exercise for the Throat Chakra

Sing in the Shower.

  1. If you are self conscious about your voice, find a time when no one is around.

  2. Belt out your favorite song or make up one of your own, maybe about how you are feeling in that moment.

  3. Sing at the top of your lungs and in a soft whisper and even if you feel silly.

  4. Notice if you feel any differently after.

Singing wakes up the vocal chords, eases tension in the jaw and mouth, opens up the lungs and makes the Throat Chakra ring!


browheader.png

Name: Ajna

Meaning: “Perception”

Location: Just above the brow at the center of the forehead

When the Brow Chakra is awake and flowing with creative kundalini-shakti, you feel:

  • Intuitive (that feeling when “you just know”)

  • A sense of leadership

  • Imaginative

  • Like you are learning deep lessons from your life experiences

  • Confident in your knowledge

When the Brow Chakra is blocked, cut off from the creative flow of kundalini-shakti, you feel:

  • Dull thinking

  • Judgemental

  • Creativity is for other people, but not you

  • Foggy brained

Creative Exercise for the Brow Chakra

Draw a Yantra.

  1. A yantra is a geometrical diagram that represents a particular energy or entity

  2. The making of the yantra is a meditation in itself and then can be used as tool to meditate upon.

  3. You will need paper, a ruler, a compass, a pencil and some instructions. I recommend this fantastic book to learn how to create a yantra: Nine Designs for Inner Peace by Sarah Tomlinson


Name: Sahasrara

Meaning: “Infinite”

Location: At the top of the head

When the Crown Chakra is awake and flowing with creative kundalini-shakti, you feel:

  • Connected to your deeper source

  • You have a positive outlook on life

  • Grateful

  • Accepting

  • Embraced

  • Whole

When the Crown Chakra is blocked, cut off from the creative flow of kundalini-shakti, you feel:

  • Disconnected from your source

  • Limited

  • Like you are striving

  • Like something is missing in your life

Creative Exercise for the Crown Chakra

Collage Vision board for what you want to manifest in your life.

  1. Gather magazines, scissors, glue and some poster board

  2. Set a timer for 10 minutes and flip through the magazines and quickly rip out any pages that speak to you about what you want your life to look like

  3. Cut out bits and pieces from these pages and glue them to your board. These don’t have to be pictures of things, they can be textures, colors, patterns that represent what you desire and how you want to feel in your life.

Feng Shui Your Way to a Creative Workspace (7 fantastic tips!)

This is a guest post by Tenaya Kolar of TPK Feng Shui & Design + a bonus interview with Tenaya at the end of the post!

1: Identify your Workspace Needs

What work will you be doing in your creative space? Does it have one main purpose? Do you have lots of different creative work you want to be able to do? Identify what work stations you need to allow your creativity to flow easily (easel, wet desk--for paint, etc, dry desk--for bookmaking, etc, computer, drafting board, yoga mat, altar, couch for reflection).

Create a list of all the types of creative work you do and you will find they naturally begin to fall into different work-station categories. These stations could all be in one room, or they could be in different places, depending on your space. Don’t rush this process.

2: Layout

Ideally all of your work stations are in a commanding position. This means you face or can easily see the main entrance to your space. If your back faces the entrance or you cannot see the entrance from where you sit, your mind will instinctively check what is behind you. It is hard to relax or get into a creative zone with these, at times subconscious, interruptions.

It is also ideal for your workstations to not lay in the direct path of the doorway. The energy coming through that large opening is very active, and can disrupt the creative process.

You want to feel relaxed and in command of your space.

When these ideals are not possible to achieve, you can place mirrors in strategic locations to enable you to see the door from where you sit or stand. Or you can place an object to help deflect the rush of energy coming through the door (a plant, something solid).


Light obviously plays a big role in where you want your work stations. Generally speaking I am able to accomplish the goals above without compromising on light and view. Think about sitting perpendicular to a window rather than directly under it (if this means your back is to the door).

Having the light shine on your back and your desktop (and thus whatever you are working on) can be warm and inspiring.

All spaces ideally have natural light from two directions. When this is not possible, place a mirror on a wall adjacent to a window so that the outside world is reflected in that mirror from where you sit, or where you enter the room.

3: Determine What Supplies You Need & How to Best Store them

Separate out your supplies by category (painting, drawing, etching, etc). This will look different depending on your own creative genius. Go through each category separately--starting with the supplies you use the least. Within each category, pick up or touch each item and ask yourself if it brings you joy. (This is a feeling in your body--be wary of the thoughts that arise in your rational mind.) You should only use supplies that make you happy (it is no fun to write with a pen you don’t love!). Donate the items you don’t love. Thank them for their service as you release them.

After you cull, it is important for everything to have a home. This enables your creative space to remain easy to clean and use when the inspiration hits you. The items you use most should be the most easily accessible. Things you access only occasionally can go on the top shelf, or bottom drawer.

Supplies you use for painting should have a home near where you paint.

  • How much space do your supplies take up?
  • Do you need a shelf for these items?
  • Do drawers work better?

Drawers work better than stacking tubs since you can access the stuff in the bottom drawer just as easily as the top. Clearly label all of your storage locations so things get put back where they belong without any effort.

Ideally your desktop (or any horizontal surface) will be easy to clear off entirely after a work session. You may have some items whose home is on the desktop (water cups and paint brushes on a painting table). Just be sure the work-space is open in preparation for your next creative impulse.

4: A few words on Clutter

If something does not have its own home, it quickly becomes clutter. The Law of Attraction states that like attracts like, which means these items quickly attract more clutter to them. Before you know it, you will have to clear a work-space in order to start creating. Clutter appears easily on horizontal surfaces (desks, table-tops, the floor). This type of clutter weighs you down, decreases your energy. Walls can also easily become cluttered.

When the walls you look at for inspiration are filled with post-its and images you don’t absolutely love, this creates mental clutter, making it difficult to enter a creative mind-set.

Avoid placing post-its or small notes to yourself up on the wall around you. Everyone needs a place for their to-do list or other important information. Consolidate said items in one location (a dry erase, chalk or cork board). When like items are placed together, they appear less as clutter, more as a statement. Make sure these tasks are not the first thing you see when you look up from a work-station (unless that work-station is where you accomplish these things). You don’t want constant reminders of what you need to get done pulling you out of the creative mind-set.

When deciding whether something should find a home in your creative space (or in any space), ask yourself:

  • Do I use it?
  • Do I need it?
  • Do I love it?

If the answer to any of these is no, it probably doesn’t belong. But the most important criteria is: Does this object bring me joy, does it make me happy to hold it, use it, own it.

Beginning to listen to your joy is a powerful tool.

We all have more things than we can ever appreciate in this lifetime. Paring down to the joyful items, creates space for greater opportunity in your life, for new opportunities to find you--ones that are aligned with who you are today. It creates space for creativity, for clarity, for confidence, for inspiration. For more tips and strategies on decluttering, visit tpkfengshui.com.

5: Color and Inspiration

Some artists work well in sparsely decorated rooms--it clears the mind. Some artists want to look up for inspiration. You should put up on your walls only things that inspire you to be who you want to be (artwork you’ve created that you love, other artists you find inspiring, a tropical landscape).

Paint your walls a color you absolutely adore. 

Invoke the feelings you want to have while you create (a relaxing water shade, a warm earthy hue). You can use one wall to inspire passion (brick red, deep-hot pink), allowing the three remaining walls to relax you more (a cool green grey). Whatever colors your use, you should love them.  

6: Stagnation

Don’t be afraid to move things around (the location of your desk/couch, etc) when a space begins to feel stagnant or when the inspiration hits you. This stirs up energy, which can be great! Just be sure to give the space a good clean before you put something else there; this helps to clear out old energy so you can start with a clean slate.

7: Getting into the Creative Mindset.

There are many fabulous books on this topic--my favorites are The Artist’s Way by Julia Cameron and The Creative Habit by Twyla Tharp.

Create a habit for yourself, things you do every time you’d like to enter into a creative mindset.

These are generally small things like making yourself a cup of tea, putting on the appropriate music, sitting down in the same place.

Focus yourself in this space by taking 10 deep breaths, allowing the clutter of daily life to float away. If the mental chatter remains, take 5-10 minutes to write whatever comes into your mind, allowing yourself to let go of it. I do this on the computer and at the end, I delete the mayhem and leave the inspirations or things I need to do at the top.

These triggers will help your mind and body co-operate and know that it is time to create.

Wishing you inspired creations!

Tenaya

TPK Feng Shui & Design


Bonus: An interview with Tenaya

I sat down with Tenaya to talk more about how to declutter, organize and Feng Shui your creative workspace. Check out the interview below:


Meet Tenaya

Tenaya inspires people to invest in their homes and in themselves. She is an expert on the impact spaces have on our lives--both positive and negative--and wants to help you unlock the potential in your home. In her courses and workshops, Tenaya uses her deep knowledge and experience in Feng Shui & Design to guide her clients toward happier and more supportive homes. Want to know more? Visit her: www.tpkfengshui.com


5 myths stopping you from creating time + space for your art

Sometimes one of the hardest parts of getting started with any practice, like yoga or art making, is finding the time and space.

It can feel like there is never enough of either.

When I worked other jobs and lived in tiny apartments, I never felt like there was enough time or space to make the art I longed to make. It always felt like I needed more hours in the day, more energy to get to going and more space to spread out.

And these days, I even though I do have a little more space, it can still feel like there isn’t enough.

But, the creative energy within keeps pressing me on anyway.

So I find ways to carve out time and space, even when it feels like I have none of either and you can too

Related: 4 Helpful ways to get out of bed for yoga (and my at home yoga space)

Today, I’m busting through 5 myths that might be keeping you from creating time and space to create your art.

Myth #1 You have to have large spans of time to do creative work

There is this belief out there that you have to have hours upon hours of time to paint and create. That masterpieces have to be started and finished in one fell swoop. But who has got that kind of time?

Even before having a kiddo around and working full time as an artist, I still didn’t have large scopes of uninterrupted time. In fact, I probably only spent about 30% of my work time actually creating art. Sometimes less.

The truth is that nobody really has time to make art. You have to make time for your art.

  •  Jhumpa Lahiri (author of The Namesake) wrote her first novel in 15 minute sessions between breastfeeding her newborn.
  • Poet Wallace Stevens wrote poems while he walked to and from his job as an insurance lawyer (McNiff)
  • I often start my paintings during my child’s afternoon naps and finish them in the evening while hanging out with my husband.

You must find small chunks of time in your day where you can make art.

Got a morning train commute? Or a half hour before you head to bed? An hour and a half at nap time? A 30 minute lunch break? 20 minutes first thing in the morning?

Action tip: Look at your day. Are there any times, even if they are as short as 10 minutes, that you could dedicate to your art practice? Find ‘em and schedule them into your planner.

Myth # 2 You have to have a studio to make art

Now, I make art in my garage turned studio, but I have made art in lots of weird and random places. I’ve made art on the pink carpeted floor of my childhood bedroom, and on my bed itself.

In college, I made a lot of art in the hallways and stairwells and common rooms of my school. I’ve made art at my kitchen table. I’ve set up in the corner of multiple living rooms and guest rooms (I have moved 7 times in the past 10 years.) I’ve made art outside and on the go, in trains, planes, and automobiles.  

There is no place, really, where art can’t be made.

It is a lot easier to make art in short spurts of time when you have a place and your supplies ready to go, but that place can be anywhere!

Action tip: Look around your current living area. Is there any corner or nook where you could set up a place to make art? And even if you don’t find one, what about creating a mobile, on the go art set-up?

Myth #3 You can’t make art in your living room or anywhere you might make a mess

I once worked in a costume shop that had a wonderful rule about mess making. This shop was incredibly organized. Every pair of scissors and tape measure had a place. But, when you were in the midst of creating something, like sewing sequences onto a ballerina bodice, for example, you were to let all the scraps, threads and extras bits fall to the floor.

There was no need, my boss told me, to take the time to pick anything up until we were done. Then at the end of the day, a huge broom would come out and we would clean it all up, but not until then.

Having the freedom to create without worrying about cleaning up after myself as I went along, made my creatively messy heart very happy.

Having a place (even if it’s temporary) to make art is helpful because when you don’t have a lot of time, knowing where to find all of the things you need to get started, without having to spend time looking around for it allows you to get going on things more quickly. 

But, it’s equally important to feel, in the midst of things, that you can throw your paint around or get charcoal everywhere and not have to worry about making a mess.

If you don’t have to worry about making a mess or ruining your floor/table/clothes, it will free you up to just play.

Here are a couple of hacks that will allow you to get as messy as you like, even if you are in the middle of your living room:

  • Use a drop cloth

Grab an old sheet and throw it on your living room floor. Boom. Place to work, wild and free.

  • Find a smock

Put on an old oversized tee-shirt or a backwards button up shirt over your clothes. Now you don’t have to worry about smearing paint on your work shirt.

  • Grab some cardboard

This is another thing you can easily throw down on the floor, table surface, your deck or the grass in your backyard. You can tape it to the wall behind where you are working if you tend to get particularly splatter-y (I tend to get paint everywhere!)

Action Tip: Gather the things you would need to make messy art no matter how fancy the floor or your clothes. Get them ready for the next opportunity you have to make art.

Myth #4 You have to have a lot of (expensive) art supplies to make art

When I was learning to paint with my dad, he would give me three colors (red, blue and yellow) + white and say, “you can make most any color you need with just these three colors. If you start with too many colors, it’s easy to make mud.”

And even though, at first I protested, I soon came to see the brilliance in his ways. By working within a limited palette, I was less likely to get overwhelmed by the options. I could learn how to work these few colors really well rather than trying to figure out how to mix a whole bunch of them and end up muddled.

Having lots of supplies can be fun, but it is totally not a requirement to make art. There are as many ways to make art as there are artists and it is not necessary to go out and buy hundreds of dollars of supplies, especially when you are first starting out. And if you haven’t spent all kinds of money on your supplies, you can be a lot less precious about the work. It’s easier to let yourself experiment and create ugly stuff.

Some simple supplies that are easy to find + inexpensive to buy:

  • Watercolor sets (like this one)
  • Kids art supplies, like crayola markers and colored pencils.
  • If you do want to buy paint, just buy a couple tubes in the primary colors (red, blue, yellow) and get really good at working with them (these are the paints I love using)
  • And you can paint on watercolor paper (which is cheaper than canvas) or even cardboard! (My brother has a friend who created an amazing series of paintings on old pizza boxes.)
  • Sharpies! (Great for line drawings)
  • Number 2 pencils
  • Computer paper (I draw on computer paper all of the time)

And here are some examples of amazing artists who don’t use ANY art supplies to create these pieces:

+Andy Goldsworthy Nature Sculptures

+Faith Evan-Sills Mandalas

+Yuken Teruya Toilet Paper Roll Forests

+Jane Perkins Found Material Paintings

actiontip.png

Action tip: What supplies or materials do you already have lying around your house (they don’t even have to be traditional art supplies)? Pull them out and see what you can create with them today.

Myth #5 But I’m not a “Real” Artist

What makes an artist a “real” artist? I think if you spend time making art, you are, by definition, an artist.

You don’t need anyone’s permission to make art.

You are innately creative and if you have the urge to create and you listen and act upon that urge, even when you barely have any time or space to create, you are an artist.

Art, like meditation or yoga, is a practice, a spiritual exercise that you have to carve out time and space for. It doesn’t just happen by itself, for anybody.

Art as a spiritual exercise suggests that any person can find a way to make time for the creative act each day.
— Shaun McNiff

Action Tip: Commit to making art as a practice. Set aside 10 minutes a day (or as much as you can commit to) put it in your calendar and get started. And just like that, YOU are a real artist.


Let me know in the comments what other things keep you from carving out time + space for your creative practice?


10 Poses to Embrace Your Creative Freedom

One of the things I love most about a great yoga practice is that feeling of having more freedom in my body afterwards. I love that soft spacious feeling that I sense in my joints and my muscles and sometimes even, my emotions. 

I think that exploring the freedom that exists right here in this body is one of the most exciting opportunities yoga offers us. It's an especially interesting inquiry to find freedom and spaciousness in the body when don't feel free, when the body feels tight or sick.

Yoga invites us to send our breath to the locked places in our bodies and to ease us into them from a place of gentle awareness.

Svatantrya: Ultimate Freedom

There is a concept in yoga called Svatantrya. According to the Tantras, there are six aspects to the nature of our being. One of them is called Svatantrya, which means unlimited freedom.

Svatantrya is the freedom we have to exist, to know and to create.

It is the idea that you are already free. Your creative energy is boundless. However, because we experience life through embodiment, through being in the body, sometimes it doesn't feel very free. The confines of the body, the aches, the discomfort and pain of the physcial experience of being in the body are very real. But by limiting us, these confines give us reference points in which to understand and experience freedom from.

The body is a container in which you experience your expansiveness and the freedom to creatively express who you are.

This sequence is designed to help you explore the freedom that exists in your body.

The poses in this sequence will help you to physically remove the tension and tightness in your hips and upper back that can sometimes restrict movement and your sense of freedom. As you move through the sequence, notice where you feel blocked up. Send your breath to those places. If you find yourself pushing into a pose, back up and begin again from a place of soft acceptance of your limitations.

Your boundaries help shape who you are.

Even if you don't feel physical freedom in the pose, see if you can find some freedom in the acceptance of your boundaries.

10 Poses to Embrace Creative Freedom by Eliza Lynn Tobin

Before you begin this sequence, warm up your body cat/cow and 3 rounds of sun salutations, ending your warm up in downward facing dog.

anjaneyasana by Eliza Lynn Tobin

Anjaneyasana (with garudasana arms) | Low Lunge

From downward facing dog, inhale and bring your right leg forward and place your right foot between your hands. Exhale and lower your left knee to the floor. Reach your arms out in front of you and bring your left arm underneath your right.

Cross the elbows and bring your palms together, extending the fingertips towards the sky. Inhale and draw from the elbows back into the shoulders, as you lift the heart upwards. Root down through your feet, as you extend freely upward through the torso and heart.

Cycle through five deep inhalation and exhalation.

Allow each breath to lift you up as each exhale grounds you to the earth. In this way, you are supported in the boundary of the body to experience your unbounded freedom.

Goddess Pose by Eliza Lynn Tobin

Utkata Konasana | Goddess Pose

Release the arms and come back to your center by bending both knees and turning the feet out toward the corners of your mat in Goddess pose. From your feet, draw energy up through your legs into the core of your pelvis and at the same time, from your pelvis press back down into your feet. Inhale and extend both sides of your torso, lengthening from your hip bones all the way to your armpits and drawing your shoulders towards one another.

Bring your palms together at your heart and draw your belly button back towards your spine. Breathe into the space of your kidneys. In each breath, find more space in the torso. If there is any place in your body that feels stuck or limited, send the breath there. Soften and free your face as you breath into the burning sensation in your legs.

Allow this heat to fuel your remembrance of yourself as you really are: free to choose in this moment how you will react towards the discomfort.

Stay here for 5 cycles of the breath.

triangle pose by Eliza Lynn Tobin

Trikonasana | Triangle Pose

On the next inhalation, extend both legs and turn your turn your left foot parallel to the back of your mat and turn your right foot to point towards the front of the mat. Line up your feet so that the middle of the left arch is in line with the heel of the right foot. Exhale and root from your pelvis down into your feet.

On the inhale, bring your arms out to the side and draw your shoulder blades onto your back. Exhale, bend halfway over the right leg, extending out through the right fingertips. Inhale, lengthen through the sides of your torso. Exhale, bring the right hand to the floor or to a block beside the right foot.

Energetically pull the legs towards one another, strengthening the container of the body.

At the same time, extend outwards from the core of the pelvis into the feet and out through the torso, head and fingertips, expanding with unbounded freedom.

Continue here for 5 inhalations and exhalations.

Ardha Chandrasana | Half Moon Pose

From triangle pose, look down at your foot right foot and begin to bend into the right knee. Take your right fingertips out in front of your right foot as you begin to shift your weight into the right foot. Lift your left leg up off the floor into halfmoon pose.

Lift and spread your toes on both feet as you lift your shins and thighs towards your pelvis. Draw your shoulder blades onto your back, so that your heart remains free. Inhale and expand the breath into the kidneys and the back of the body. Exhale and root your tailbone towards your left foot.

Feel yourself floating in the unlimited space between balance and falling.

Try to stay here for 5 breaths. If you fall out, no worries, just hop back in and try again.

Ardha chandrachapasana by Eliza Lynn Tobin

Ardha Chandrachapasana | Half Moon Bow Pose

From ardha chandrasana, exhale and bring your left knee into your belly. Reach back with your left hand and grab onto your left foot. Inhale as you press your left foot into your left hand and open up through the front of the body by drawing the left shoulder back and rooting the tailbone down.

Stand firmly in your right leg, energetically hugging the thighs towards one another as you continue to press the left foot into your hand, opening up into the unlimited space of your heart.

Hold for 5 breaths, grounding down through the standing foot on each exhalation and expanding outward from the pelvis on every inhalation.  

Hanumanasana prep by eliza lynn tobin

Hanumanasana Prep | Monkey Pose Prep

From ardha chandrachapasana, release the foot and exhale the leg gently back to a standing triangle. Bend into your right knee and bring your left knee down to the mat in a low lunge. Straighten your right knee, while pressing your right heel into the mat, toes lifted to the sky. Bring your fingertips to the floor or onto blocks on either side of your right leg. Keeping your toes of the right foot lifted and engaged, pull the muscles up from your right foot all the way into your right hip.

You can hook a thumb into the crease of your right hip and pull it backwards. Keep that as you inhale and lengthen from your hips up the sides of your body, all the way to the crown of your head. Exhale and begin to fold over your right leg. Send your breath into the back of your thigh as you root down through the heel of your right foot. On each exhale, hug in, engage the muscles that make up the container of your body. On each inhale, extend, length, expand back out.

Find the corners of your body that feel stuck and expand the free flowing energy of your breath into those places.

Continue for 5 breaths.

Wildthing by Eliza Lynn Tobin

Camatkarasana | Wild Thing

Step back into downward dog. Begin to shift your weight onto the outside edge of your right foot and into your right hand, pressing down through the four corners of your right hand. Pull energy up from the floor and plug your right shoulder into it’s socket as you begin to lift your left foot off the floor, bending the left knee and then gently placing your left foot on the floor behind you.

The action of drawing energy up from your right hand into your shoulder socket will give you the strength and stability to then extend your left arm over your head and lift your heart to the sky. Root your tailbone down to protect your low back.

This pose can help you to feel into the expansive opening through the front of your body and your heart.

Hold this pose for 5 breath cycles and then come back to downward facing dog and repeat steps 1-9 on the left side.

Bow Pose by Eliza Lynn Tobin

Dhanurasana | Bow Pose

From Downward facing dog, come down to your hands and knees and then to your belly. Bend your knees, so that your feet are lifting towards the sky. Draw your shoulders onto your back and reach back with your hands to grab hold of the tops of your feet. Spread your toes apart to activate your shins. Draw your tailbone down so that your belly button lifts towards  your spine.

Keep that as you inhale, then exhale and lift your upper body by pressing your feet into your hands. Continue to draw your shoulders into their sockets as your chin moves back and your heart, forward. Feel the deep opening across the chest and upper back as you inhale into and lift the kidneys towards the sky to become spacious, light and free in the upper body.

Release any work on the part of your neck and face. Let them be soft and free.

After 5 breaths, exhale and release down, bringing the head to one side and with knees still bent, rock the legs back and forth and wash your low back with your breath.  

Gomukasana by Eliza Lynn Tobin

Gomukasana | Cow Face Pose

From your belly, lift onto your hands and knees. Cross your right knee over the left and then sit back, knees stacked and bringing your hands to either foot. Do your best to root through both sides of your pelvis evenly down through the sits bones. Keep the toes active, pressing the feet into your hands as you inhale and lengthen from the hip crease up into the arm pit, moving the head of your shoulders back.

Exhale and fold over your knees, pressing your inner thighs in towards one another and down towards the floor to find more freedom and spaciousness in the hips. Inhale in the low back, finding space in the kidneys, exhale, root the tailbone down.

Allow each breath to become the catalyst for a small micro movement that shift by tiny shift, opens up expanses in the container of your body.

Stay here for 5 cycles of breath. Release then cross the left knee over the right to do the other side.

Child's Pose by Eliza Lynn Tobin

Balasana | Child's Pose

Come back to the hands and knees. Open your knees wider than hip distance. Inhale, lengthen through the sides of body and exhale, bring the torso and head down to the floor, arms outstretched to the front edge of your mat. Allow the body and mind to rest.

Notice if you feel any part of your body feels more free than it did when you began. Notice if there is any difference in the spaciousness of your breath.

Continue to breath here for 5 cycles of breath and then lie down on your back for Savasana.

Savasana | Corpse Pose

As you settle into savasana, rest your arms beside you and allow your legs to fall open naturally. Take a deep inhalation and exhale through your mouth. Do this a few more times before gently releasing into the natural flow of your breath. As you let the gentle breath wash over you, feel in your body the places that feel more free.

Send love and acceptance to those parts of yourself that still feel bound and blocked.

Stay here for a few moments and allow your body to release into your mat.

Where did you find freedom in your body? Did you find your boundaries and limitations too?


Eliza Lynn Tobin